First of all I must say a huge thank you to Nicki from Sunshine Reflections who was my 'Yoda' for this challenge. She patiently talked me through the process, offering her expert advice and a calming word when the sewing machine freaked me out! Take a look on Nicki's blog at some of the amazing projects she has done.
So, as a quilting virgin I opted for a cushion cover rather than a king sized bedspread (phew!) and in an 'Idiot's Guide' fashion here's how I got on:-
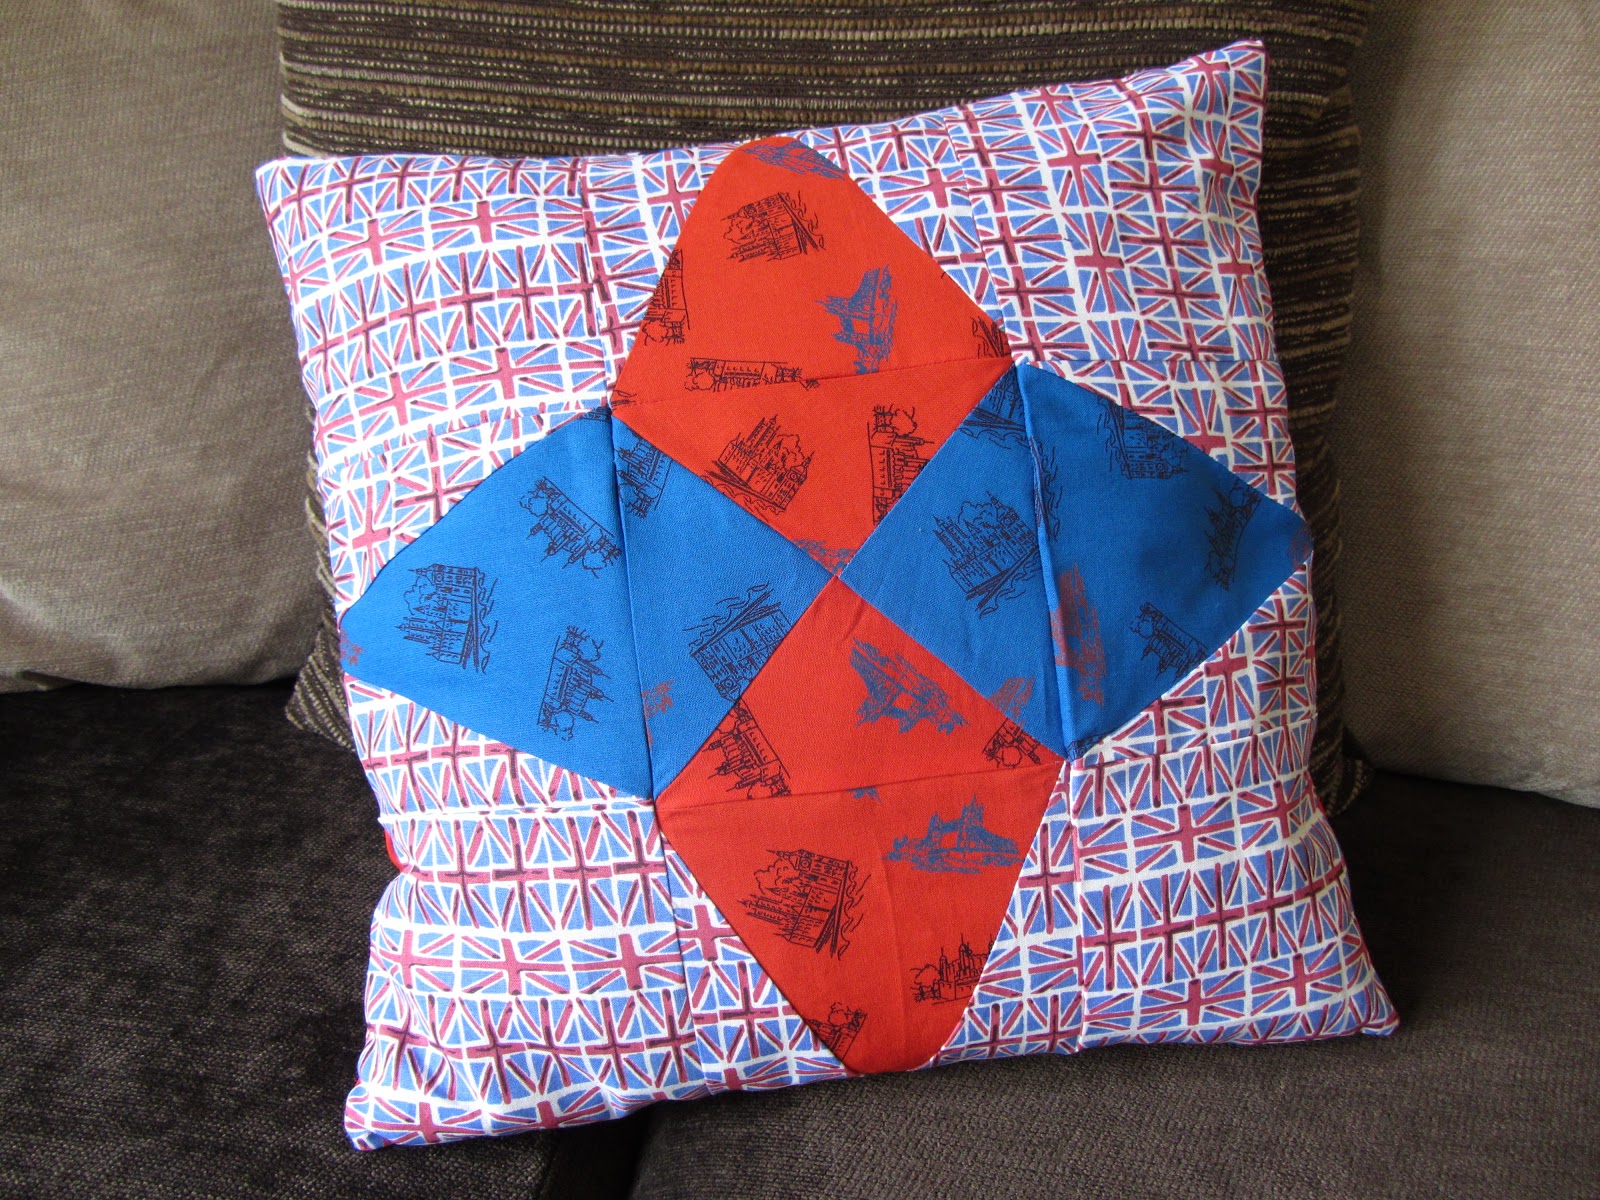
1. I chose my pattern; a simple 15" cushion cover with 9 x 5" squares. The pattern I picked had a star in the centre so 5 of the squares were broken up into sections of the star (it will make sense when you see the picture!)
2. I chose my fabric and still feeling patriotic following the awesome Olympic and Jubilee celebrations last year, I opted for a truly British theme of red, white and blue.
 3. I traced the pattern shapes onto paper and cut them out. Top Tip - If you think you will re-use your pattern cut outs, laminate them so they last.
4. Using a large cutting board and a very nifty wheelie knife I cut out the fabric using my templates.

5. Once all my pieces were cut out I lay them out to double check before I started sewing.
(There are 4 x 5" corner pieces, the other 5 sections are made up of triangle slices, the very centre square has 4 sections - 2 x red and 2 x blue - and the 4 outer sections have 2 x flag pattern and 1 coloured triangle).
 6. Next step was to pin the sections together, we did this two little bits at a time so I only had to sew small sections to begin with. I did one row at a time until I had three strips of 15" x 5".
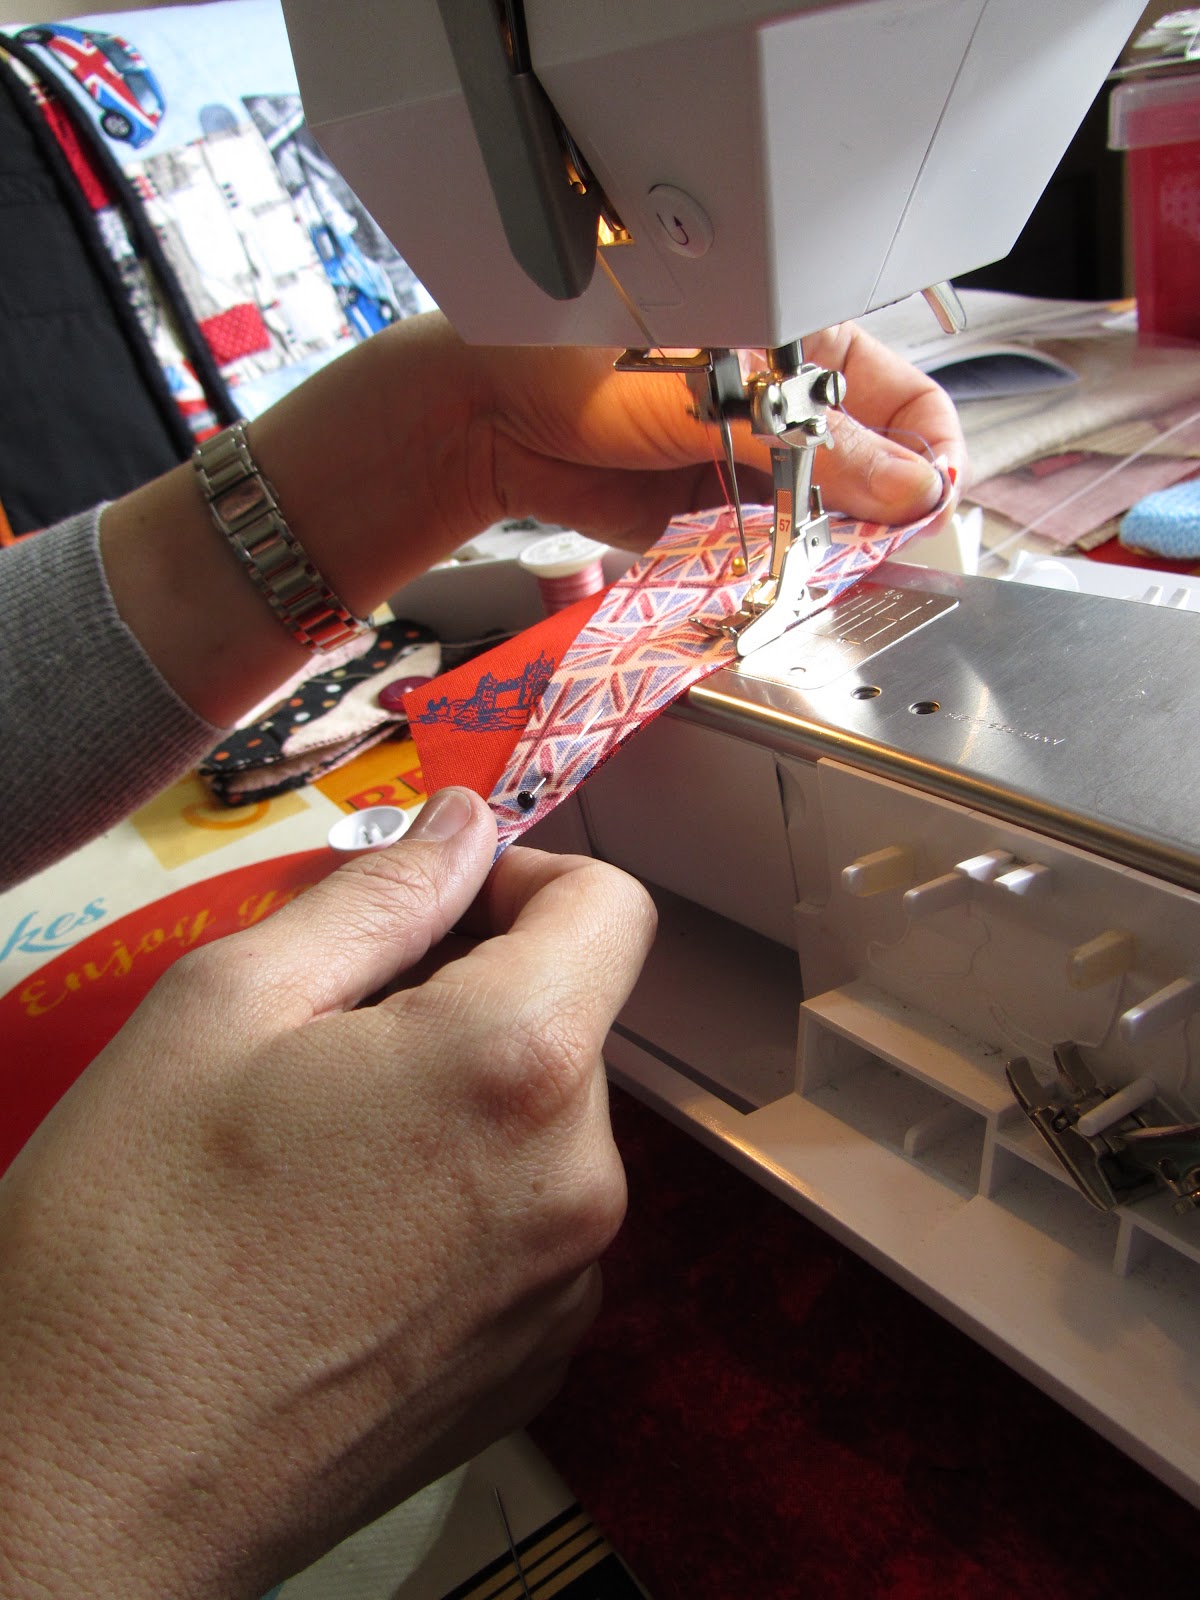
7. Once that was done I sewed the strips together (carefully!) until I had a finished front panel, yay!

8. With my 'awesome' front section completed we chose two fabrics to make up the back side, 1 x 9" and 1 x 12", these would overlap to form the envelope to keep our cushion filling safe. I did a hem along one edge of each piece so they looked neat and then it was time to put it all together.
9. Turning the fabric so it was pattern side facing each other, I sewed the front and back pieces together and did a reverse stitch over the seam ends for added strength
10. Once I had gone all the way round it was time to turn the cover the right way round and see the finished product...
 ...so proud!
So there you have it, my first ever hand made quilt cushion cover and no blood, sweat or tears!
I'm off to Hobbycraft now to stock up on fabric...thread...pins...buttons...ooh I may be addicted.
Log on to find out about the craft courses Nicki runs at Hobbycraft Solihull and watch this space for more amazing cushions, there will be no stopping me now.

What have you made that you are proud of? I'd love to hear your 'I made that' stories, leave a comment below.
Please remember to select a 'Comment As' from the drop down box so we can all read about your fantabulous creations.
Hi Shelley,
ReplyDeleteInspired by your Fairy Garden post I spent yesterday brightening up a little corner of my back yard with a walk-through rockery. The most satisfying thing was, all the ingredients - rocks, flints, paving stones, a sack of shingle - were already laying around under bushes or behind the shed in other parts of the garden; junk waiting to be turned into something nice. But isn't that what creativity is all about? Why buy something when you can make something new from the stuff that's right in front of you?
Luckily for me, the previous householder was an obsessive hoarder and hider. Either that or there really are fairies at the bottom of my garden, because every time I think I could just do with a flower tub or whatever it seems to magically appear peeking out from the foliage.
Hi Douglas,
DeleteYour rockery sounds fabulous and what a great way to make do and mend! If the sun ever does appear and we can get out in the garden I hope you can carry on with the good work.
Happy gardening.
Shelley :)